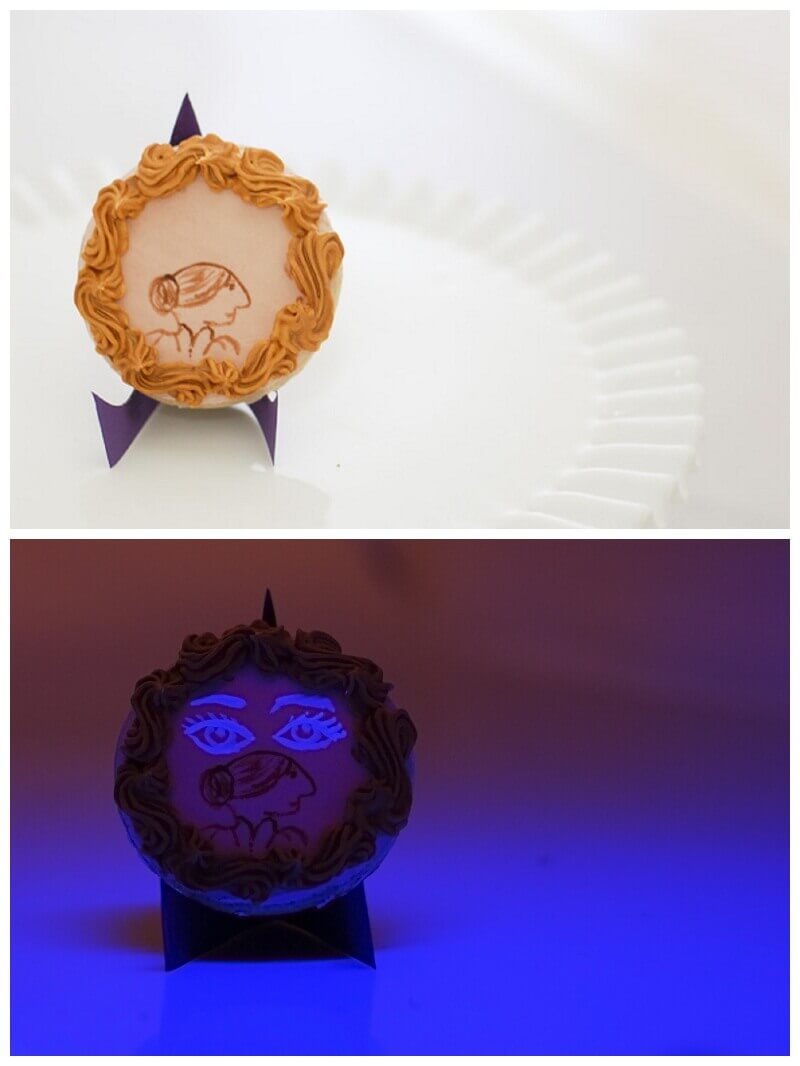
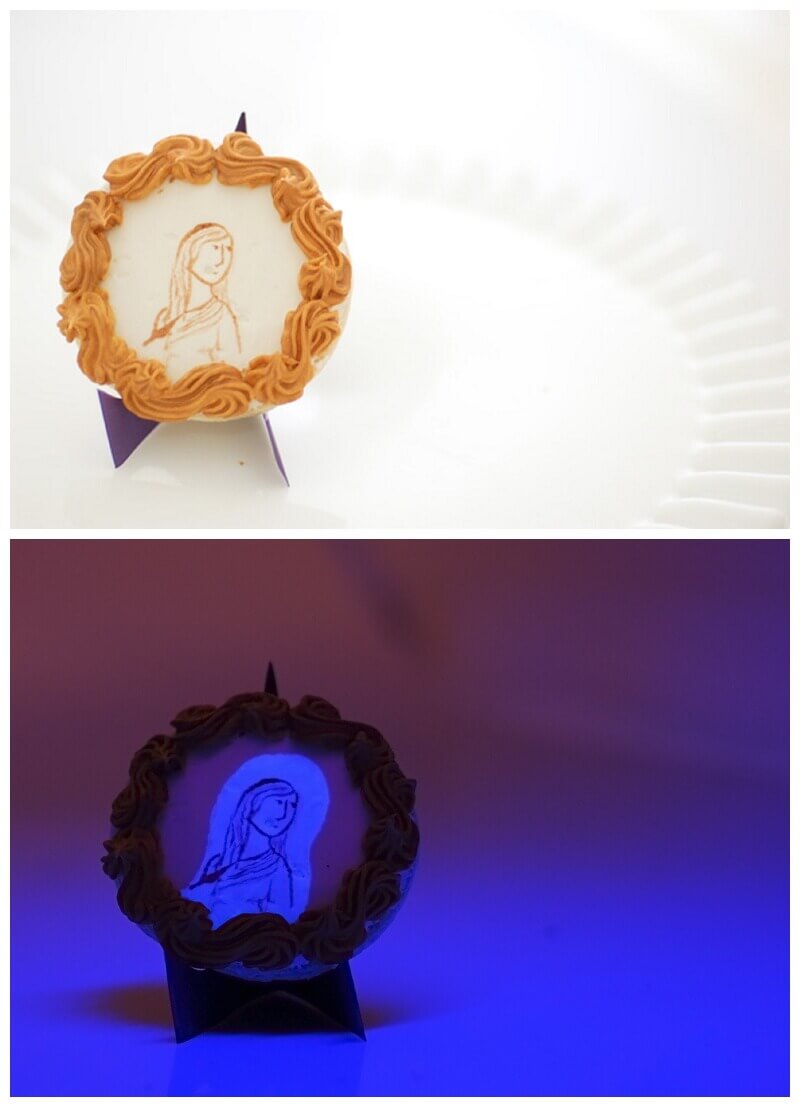
I had so much fun making the haunted portrait gallery cookies for the Let the Ghoul Times Roll black light Halloween party.
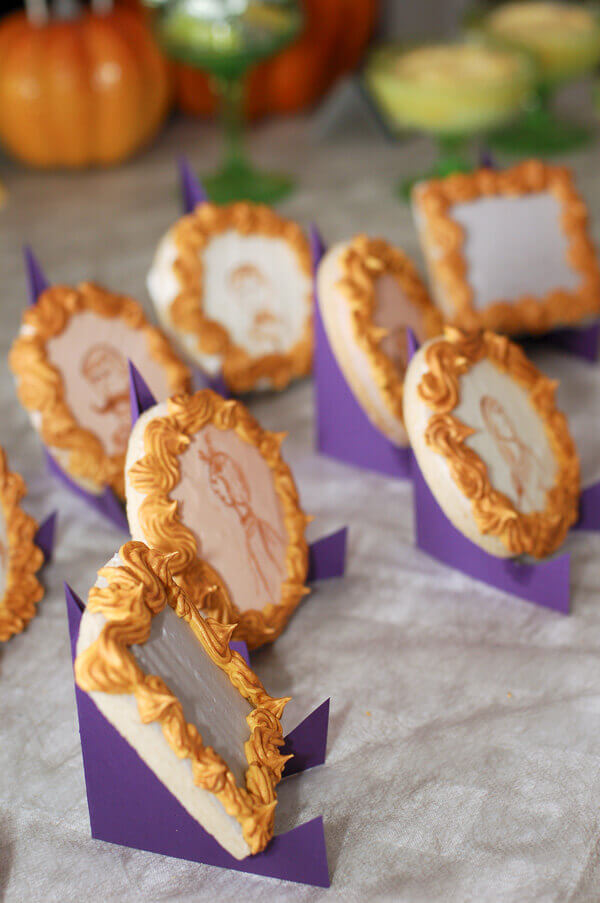
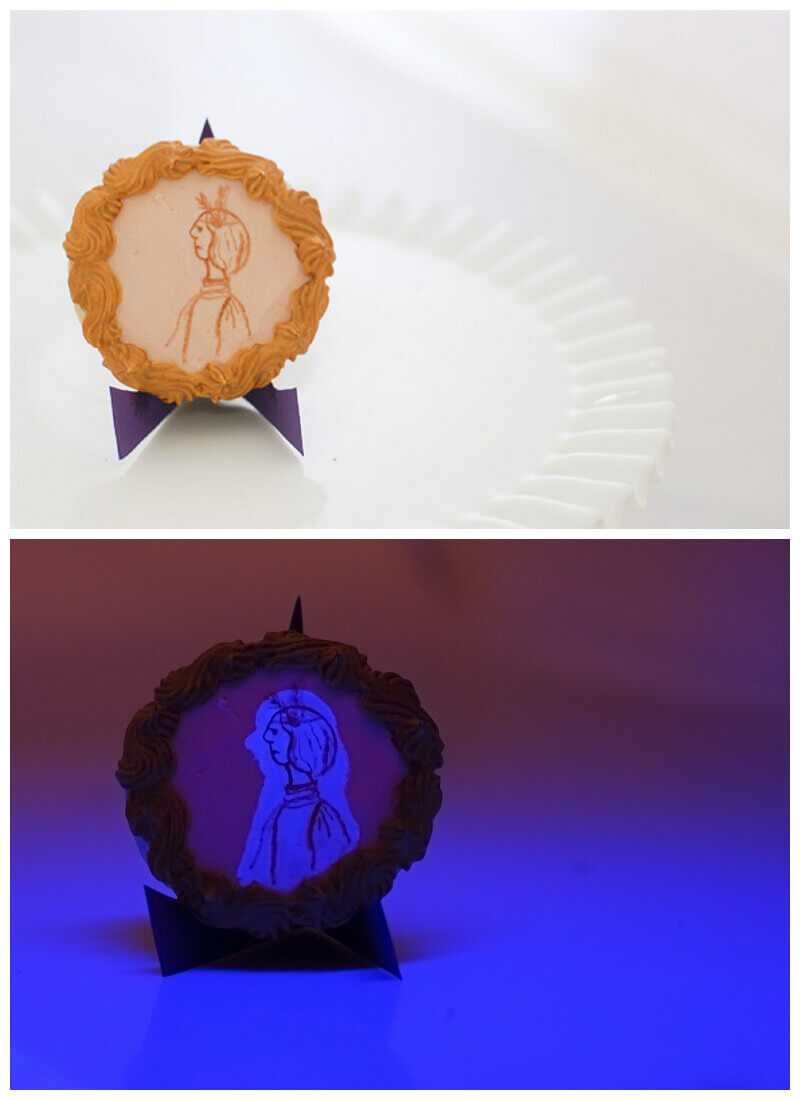
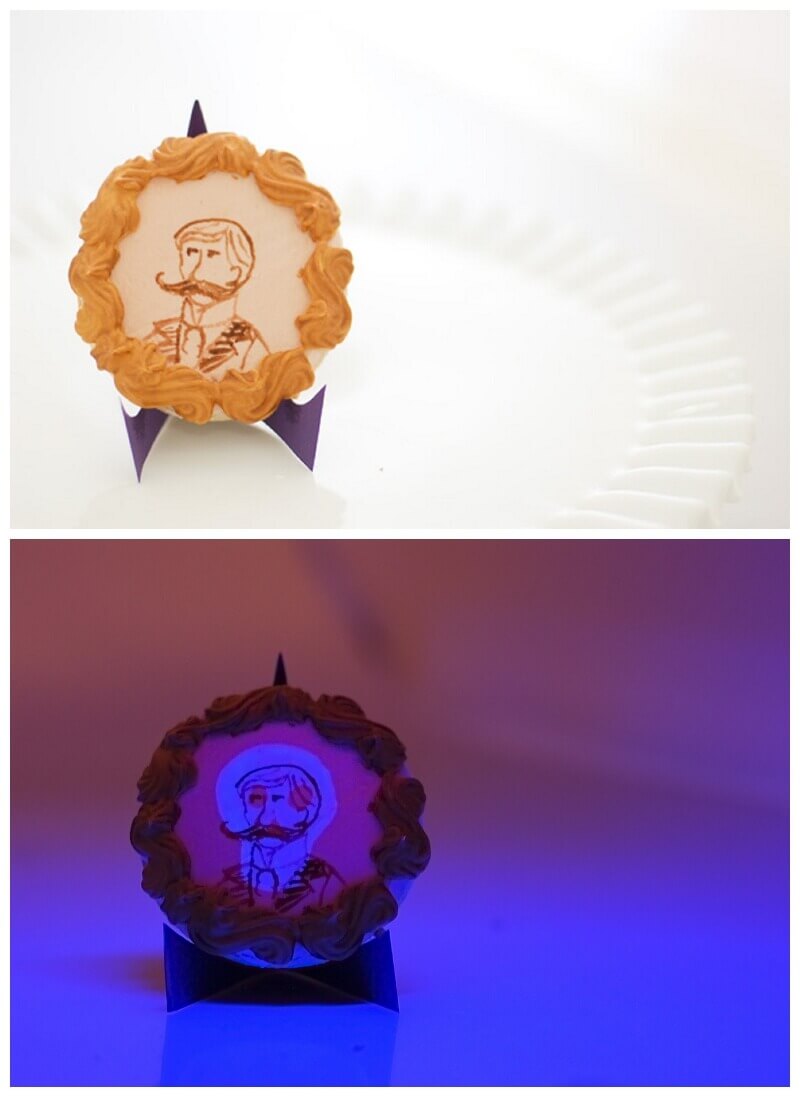
Under regular light, they were sugar cookies with old painted portraits and a couple mirrors in gilded frames. But once the lights turned out and the black lights turned on...
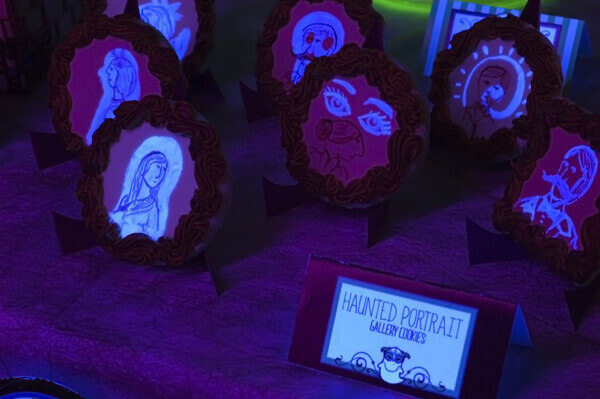
...the spirits came out to play!
It was the idea of these cookies that lead me to design this whole regular light/black light party. I was obsessed with the idea of mysterious elements popping out under black light.
It's a good thing I was obsessed, because I tested multiple theories of how this should work before I found one that actually did work.
Attempt #1: Quinine in tonic water glows a gorgeous blue under black light, but when you try to thin out colored royal icing with it, all glowy awesomeness is destroyed.
Attempt #2: If you paint with tonic water, it kinda works. Not great, but it'll do in a pinch.
Attempt #3: If you boil down tonic water to concentrate the quinine, and use that to paint on the cookie surface, you get better results. But it still wasn't quite as distinct as I wanted for my cookies.
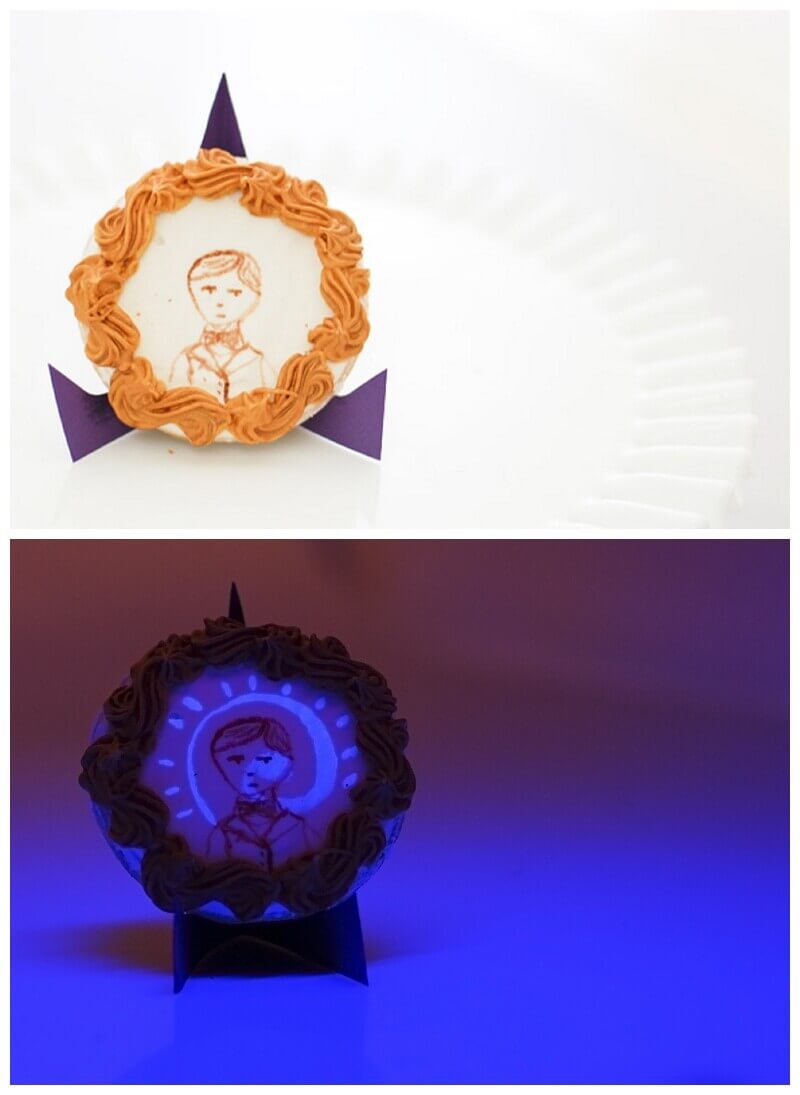
Attempt #4: Finally, the results I wanted!! I used non-toxic black light reactive face makeup to paint on the designs. Was it ideal? No. But I made sure to find a non-toxic brand at my local costume store that was suitable for use on lips. Much like disco dust, which is classified as non-toxic as well, I'm willing to do some unconventional (but not harmful) things to make a great cookie!
To make these cookies, I first baked up and iced the basic shapes, circles and squares. Shapes you'd see for framed paintings and mirrors in an old Victorian home. I wish I'd had ovals and rectangles, but I was too lazy at this point to make my own cutters or even templates.
I chose to spread the base icing on the cookies rather than use the flooding method, because I wanted that little bit of texture to give the cookies more of a canvas effect. Plus it was fast and easy!
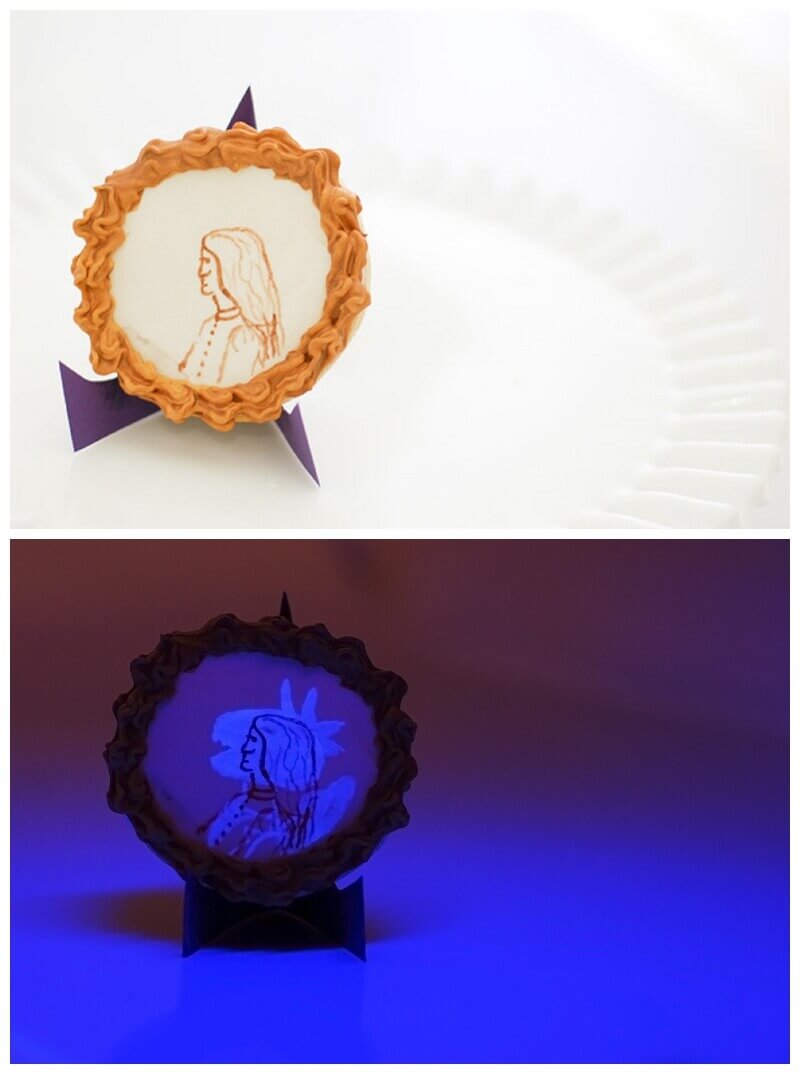
I piped the scrolled boarder on the still-wet base coat of icing, and let both dry completely. Once entirely dry, I painted the icing frames with gold luster dust, and used food coloring thinned with vodka (and a VERY tiny paintbrush) to paint on the regular light portraits. I let these dry completely before heading to the next step.

Once the daylight-visible image was entirely dry, I thinned the glow in the dark makeup with some vodka, and carefully painted the black-light-visible design over the top. (The haunted mirrors didn't have any daylight-visible painting, so were faster to make, obviously.) When painting with the makeup, it's very handy to have a black light illuminating your work surface. Otherwise you'll be painting blind.
And there you have it. I would have taken a photo of the other mirror cookie, but my three year old got to it before I could take the picture. The flavor was clearly a hit, judging by how quickly it was devoured!

.png)