If you're fairly new to this blog, you might not know that it started as an extension of a business I ran for 13 years, Tradewind Tiaras. Yes, I was a full time tiara and wedding accessories designer! Not many people who can say that. ;-) I shut down that business about a year ago to focus on Tikkido, but I still have all of my supplies and thought I'd share tutorials for making some of the more popular items I used to make and sell.
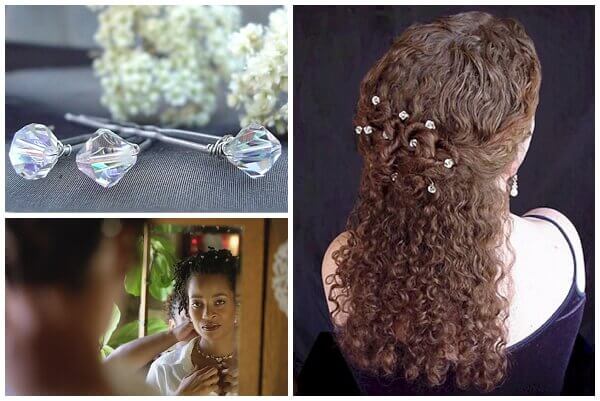
I'm going to start with the very easiest of projects: Swarovski crystal hairpins. It only takes a few minutes to make a set, and it's a great way to add high quality sparkle to your hair--for a wedding, a princess party, a prom, or just if you're feeling a little sparkly and feisty one day.
.JPG)
Materials and Tools Needed for Swarovski Crystal Hairpins DIY:
- 26 or 28 guage craft wire
- hairpins
- 8mm Swarovski crystals, round (item 5000) or bicone (Swarovski item 5301 or 5328)
- Wire cutters
- needle nose pliers
- flat nose pliers (optional)
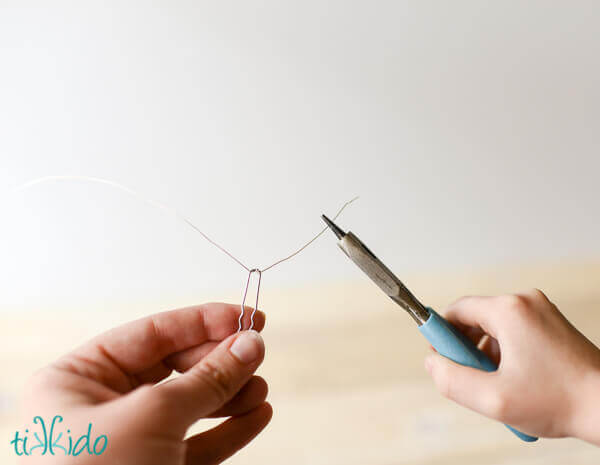
Start by winding the wire around the top bend of the hairpin. Use the needle nose pliers to grasp the wire and pull it tightly each time you make a wrap around. Wrap around THREE TIMES. Fewer, and the hairpin won't be secure enough. More, and it gets bulky. Trust me, three is the magic number. I've made a LOT of these hairpins over the years. Once you've tightly wound the wire around the hairpin three times, trim the short end of excess wire away.
(If you're wondering, that's my 5 year old daughter's hand on the right of the picture, helping me illustrate. I'm not the most symmetrical person, but I'm not that out of whack.)
.JPG)
Thread an 8mm Swarovski crystal on the wire, then wrap three more times around the top bend of the hairpin.
.JPG)
Finally, wrap the wire snugly around the whole top of the hairpin three or four times (right at the top bend of the hairpin, right under the crystal). This keeps the crystal from wobbling if you didn't get it perfectly tight, and makes the hairpin look a little more finished (though you don't see that part when you're wearing the hairpin, so don't matter if it's not gorgeous).
Trim the excess wire away, and use the flat nosed pliers to squish down the cut end. You can use needle nose pliers for this, but it's easier with the flat ones (the ones I call "the squishers.").
.JPG)
Told you it was easy! (And geez, I really need a macro lens if I'm going to be doing many of these tutorials.)
Where would you wear these sparkly little gems for your hair? I'm in the long process of growing my hair out, and can't wait until I can start wearing fun hairpins again!

.png)